✪ Key Takeaway: Agarita berry jelly is a tart-sweet wild berry preserve from Texas that requires simple foraging and basic jelly-making skills.
Introduction
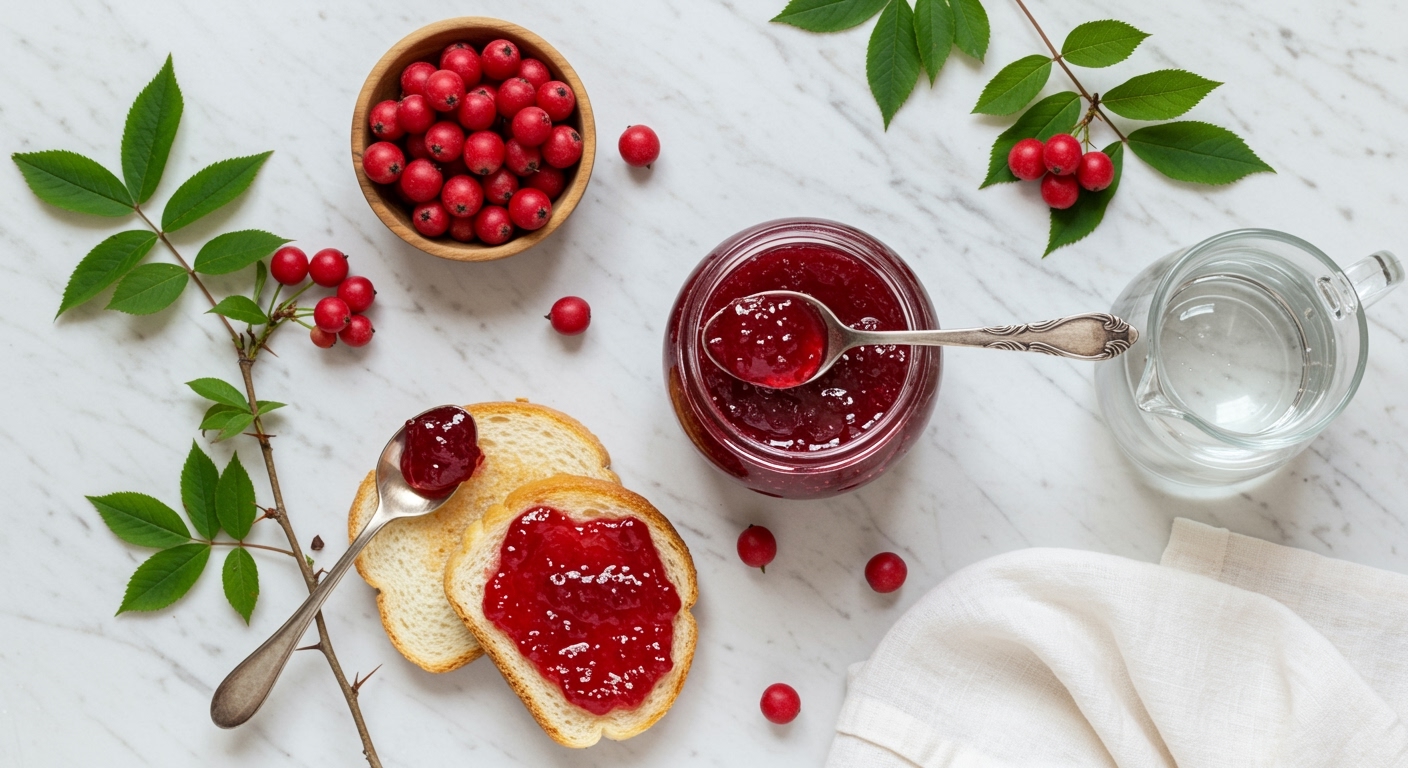
Imagine biting into toast spread with jelly that tastes like wild berries mixed with tart cranberries and a hint of sweetness.
That is exactly what agarita berry jelly delivers.
This traditional Texas recipe turns foraged wild berries into a ruby-red preserve that beats anything you will find in stores.
Hi, I am Abdur, your nutrition coach, and today I am showing you exactly how to make agarita berry jelly that captures the authentic taste of the Texas Hill Country.
What’s the Origin of This Recipe?
Agarita berries come from a thorny shrub native to Central Texas and parts of the Southwest.
The plant has been used by Native Americans for centuries, who ate the berries fresh and made them into drinks.
When European settlers arrived in Texas, they learned about these wild berries from indigenous people.
They started making jelly from the berries, creating a tradition that continues today.
The agarita bush blooms with yellow flowers in early spring, and by April or May, the berries ripen to a bright red color.
Foraging for these berries became a springtime ritual for many Texas families.
The challenge is that the bush has sharp thorns, making harvesting difficult but worth the effort.
Today, agarita jelly remains a cherished part of Texas food culture, often made in small batches and shared among friends and family.
✪ Fact: Agarita berries contain small seeds that must be strained out during jelly making.
Is This Recipe Healthy?
Agarita berries are packed with vitamin C and natural antioxidants.
These compounds help your body fight oxidative stress and support immune function.
The berries themselves are low in calories and contain beneficial plant compounds.
However, jelly requires adding sugar for preservation and proper setting.
A typical serving of jelly contains about one tablespoon, which has roughly 50 calories and 13 grams of sugar.
This makes it a treat rather than an everyday health food.
You can reduce sugar slightly, but going too low will affect the texture and preservation quality.
The good news is that homemade jelly contains no artificial preservatives, colors, or additives found in commercial versions.
Enjoy this jelly in moderation as part of a balanced diet.
✪ Total Time: 90 minutes | ✪ Total servings: 8
Tools
- Large pot for cooking berries
- Jelly bag or cheesecloth for straining
- Heavy-bottomed pot for making jelly
- Candy thermometer
- Wooden spoon
- Sterilized jars with lids
- Ladle
- Large bowl
✪ Pro Tip: Always sterilize your jars by boiling them for 10 minutes before filling with hot jelly.
Ingredients
- 4 cups fresh agarita berries
- 3 cups water
- 3 cups granulated sugar
- 1 package powdered pectin
- 2 tablespoons lemon juice
✪ Note: Fresh berries work best, but you can freeze them immediately after harvesting if needed.
Instructions
- Rinse the agarita berries thoroughly under cold water to remove any debris or leaves.
- Place berries in a large pot with 3 cups of water.
- Bring the mixture to a boil, then reduce heat and simmer for 20 minutes until berries are soft.
- Mash the berries gently with a potato masher while they cook.
- Pour the cooked berry mixture into a jelly bag or cheesecloth-lined strainer over a large bowl.
- Let the juice drip naturally for at least 2 hours or overnight without squeezing the bag.
- Measure exactly 3 cups of the strained juice into a heavy-bottomed pot.
- Add the powdered pectin and lemon juice to the juice.
- Bring the mixture to a rolling boil over high heat, stirring constantly.
- Add all the sugar at once and stir until completely dissolved.
- Return to a full rolling boil and cook for exactly 2 minutes, stirring constantly.
- Remove from heat and skim off any foam from the surface.
- Ladle the hot jelly immediately into sterilized jars, leaving 1/4 inch headspace.
- Wipe the jar rims clean and seal with sterilized lids.
- Process in a boiling water bath for 5 minutes for proper sealing.
- Remove jars and let them cool completely on a towel on the counter.
- Check that all lids have sealed properly by pressing the center, which should not pop.
- Store sealed jars in a cool, dark place for up to one year.
✪ Pro Tip: The jelly will continue to set as it cools, so do not worry if it looks thin when hot.
Nutrition Facts (approximate)
- Calories: 50 kcal
- Protein: 0g
- Carbohydrates: 13g
- Fat: 0g
✪ Note: Nutrition values are per 1 tablespoon serving of jelly.
What Are Common Mistakes to Avoid?
The biggest mistake is squeezing the jelly bag to extract more juice.
This forces pulp and sediment through, making your jelly cloudy instead of clear.
Let gravity do the work, even if it takes longer.
Another common error is not bringing the mixture to a full rolling boil before adding sugar.
A rolling boil means the mixture continues bubbling even when you stir it.
If your boil is too gentle, the pectin will not activate properly and your jelly will not set.
Many people also reduce the sugar too much, thinking they are making it healthier.
Sugar is not just for sweetness in jelly making.
It works with pectin to create the proper gel structure and acts as a preservative.
Cutting sugar by more than 25 percent will result in runny jelly that does not keep well.
Overcooking is another issue that leads to tough, rubbery jelly.
Once you add the sugar, cook for exactly the time specified and no longer.
Finally, not sterilizing jars properly can introduce bacteria that spoil your jelly.
Always boil jars and lids before filling them with hot jelly.
✪ Fact: Jelly that does not set properly can be recooked with additional pectin to fix the problem.
What If You’re Missing an Ingredient?
If you cannot find powdered pectin, you can use liquid pectin instead.
However, the timing changes because liquid pectin goes in after the sugar, not before.
Follow the instructions on your liquid pectin package for best results.
Some people make jelly without added pectin by cooking it longer until it reaches the gel point.
This requires more time and attention but works if you have no pectin available.
If you are out of lemon juice, you can substitute with the same amount of lime juice or white vinegar.
The acid helps the pectin set and balances the sweetness.
For sugar, you must use granulated white sugar for traditional jelly.
Honey or other sweeteners change the chemistry and will not work with regular pectin.
Special low-sugar pectins exist if you want to use less sugar or alternative sweeteners.
If you do not have enough agarita berries, you can mix them with other tart berries like cranberries or currants.
The flavor will change slightly, but you will still get a delicious jelly.
Just maintain the same total amount of fruit and juice called for in the recipe.
✪ Pro Tip: Never substitute artificial sweeteners for sugar in traditional jelly recipes as they will not set properly.
Can You Store Leftovers?
Properly sealed jars of agarita jelly can be stored in a cool, dark pantry for up to one year.
The key is making sure the jars sealed correctly during the water bath processing.
You will hear a popping sound as each jar seals while cooling.
Once you open a jar, store it in the refrigerator and use within 3 weeks.
The high sugar content acts as a natural preservative, but refrigeration is still necessary after opening.
Use clean utensils every time you scoop jelly from the jar to prevent introducing bacteria.
If you notice any mold, off smells, or changes in color, discard the entire jar.
Never taste jelly that looks questionable.
For freezing, you can store jelly in freezer-safe containers for up to one year.
Leave extra headspace because the jelly will expand when frozen.
Thaw frozen jelly in the refrigerator overnight before using.
The texture might be slightly softer after freezing, but the flavor remains excellent.
✪ Note: Always label your jars with the date so you know when they were made.
Can You Scale This Recipe?
This recipe scales up beautifully if you have a large harvest of berries.
You can double or even triple the batch as long as you have a pot large enough.
The cooking time remains the same because you are still bringing the mixture to a rolling boil.
Just make sure your pot is only half full to prevent boil-overs.
Jelly making creates a vigorous boil that can quickly overflow a too-small pot.
For scaling down, you can make a half batch with no problems.
Use 2 cups of berries, 1.5 cups of water, and adjust the other ingredients proportionally.
The cooking time stays the same because the temperature is what matters, not the volume.
One important note is that you should not make more than a quadruple batch at once.
Very large batches take too long to come to a boil, which can affect the pectin and prevent proper setting.
If you have many berries, make multiple standard batches instead of one giant batch.
This ensures consistent quality and proper gel formation every time.
✪ Pro Tip: Making multiple small batches gives you better control over quality than one huge batch.
Can You Customize This Recipe?
You can create interesting flavor variations by adding spices during the cooking process.
Try adding a cinnamon stick or a few whole cloves while simmering the berries.
Remove the spices before straining the juice.
Some people add a splash of vanilla extract or almond extract to the finished jelly for extra depth.
Add extracts after removing the jelly from heat, using just 1/4 teaspoon per batch.
For a more complex flavor, mix agarita berries with other wild berries like dewberries or mustang grapes.
This creates a unique wild berry blend jelly.
You can also make a spicy version by adding a small amount of finely minced jalapeño to the berry mixture.
The sweet-tart-spicy combination works wonderfully with cream cheese and crackers.
For a savory twist, add fresh herbs like rosemary or thyme during the simmering stage.
This creates a jelly perfect for pairing with roasted meats or cheese plates.
Some adventurous cooks add a tablespoon of bourbon or wine to the finished jelly for an adult version.
Just remember that any additions should be subtle so they complement rather than overpower the natural berry flavor.
✪ Fact: Agarita jelly pairs exceptionally well with wild game meats like venison and quail.
The Bottom Line
Making agarita berry jelly connects you to a Texas tradition that spans generations.
The process is simple, the results are delicious, and you will have homemade preserves that make wonderful gifts.
Do not let the thorny bushes intimidate you.
The reward of that ruby-red jelly is worth every scratch.
The best jelly comes from berries you picked yourself and patience you gave the process.
Now I want to hear from you.
Have you tried making agarita jelly before?
What flavor variations did you create?
Share your experiences, questions, or favorite ways to use this wild berry jelly in the comments below.
References
At NutritionCrown, we use quality and credible sources to ensure our content is accurate and trustworthy. Below are the sources referenced in writing this article:
- Texas Jelly Making: Agarita Jelly Recipe
- Edible Austin: Agarita Jelly
- Express News: Recipe Agarita Jelly
- Hammer on Rye: Agarita Jelly How to Harvest and How to Make It
- USC Folklore: Agarita Jelly